This is a follow-up to the recent MadCode webinar “Use Android Studio Like a Pro”, where Michael and Nikolay (Android Engineers at Stanfy), shared their advice on how to get the most out of Android Studio by using codebase navigation and a set of handy shortcuts. Let the main Android app development tool make you more productive!
Presentation Assistant
To demonstrate which keyboard shortcuts are being used throughout this article, we are using the Presentation Assistant plugin:

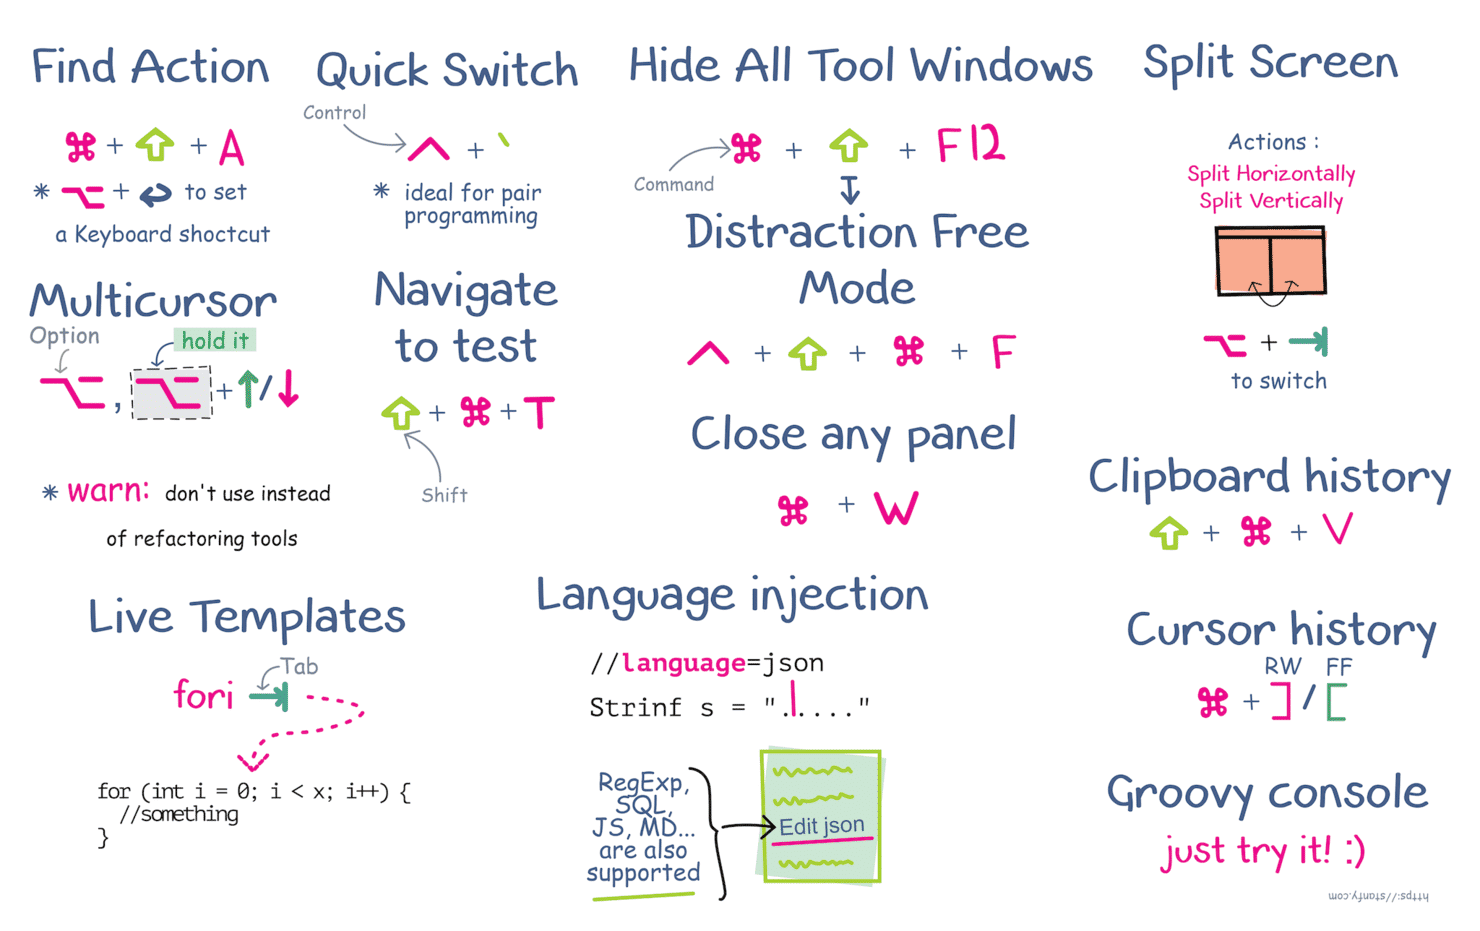 We've compressed all shortcuts and tricks from the article into a printable cheatsheet. Download it here.
Action search
One of the most exciting things about IntellyJ IDEs is an action search tool. With this tool you can find by name and perform any action. There is a dialog window to show you what keyboard shortcut you can use for this action (a perfect cheat sheet!):
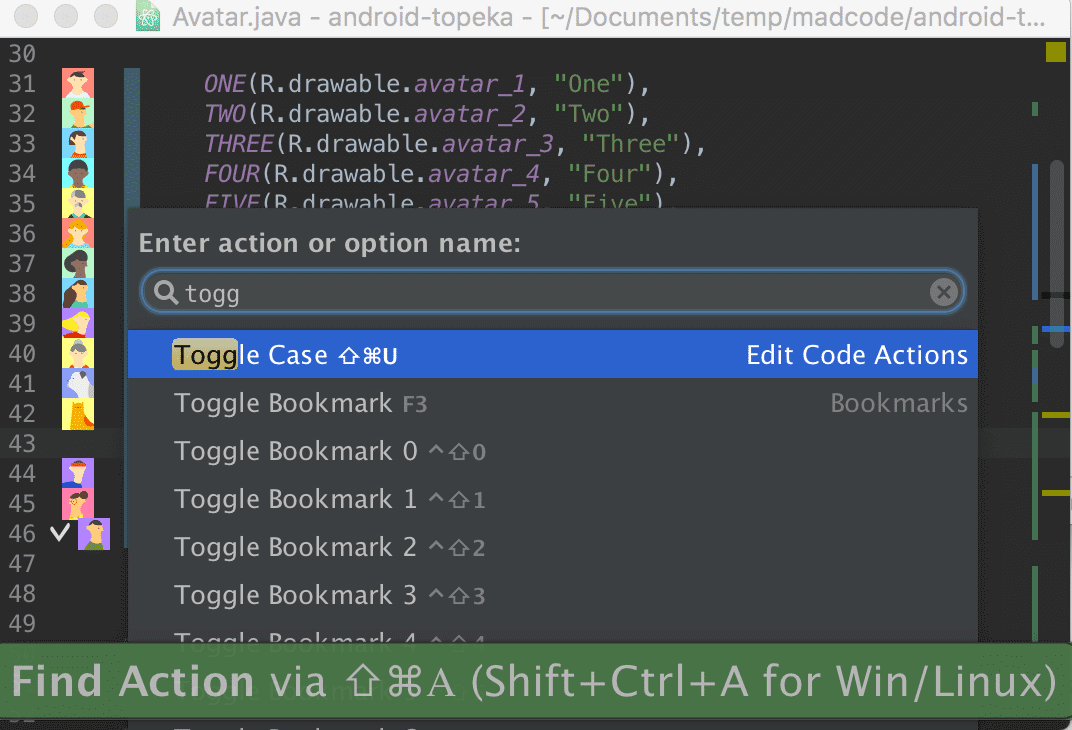
But even if there is no keyboard shortcut for you needs you can assign it right from dialog! In order to create a new shortcut, find required action and press Option+Return.
Quick switch scheme
Whether you’re practicing pair programming, or simply sharing a computer with another developer, chances are that you don’t have the same keymap and/or layout preferences in the Android Studio. In this case, to make your workflow more convenient you can:
- Export your and your colleague’s keymaps and other settings with Action Export Settings
- Import them in the AS on the machine that you are both going to be working on
- Use Quick Switch Scheme dialog to fluently switch between your keymaps
Quick Switch Scheme allows you not only to change keymaps, but also code style (useful when switching between projects that have different code conventions), look and feel (Darkula or Default) and more importantly, View Mode, allowing you to enter Distraction Free Mode (more on this next) or Presentation Mode.
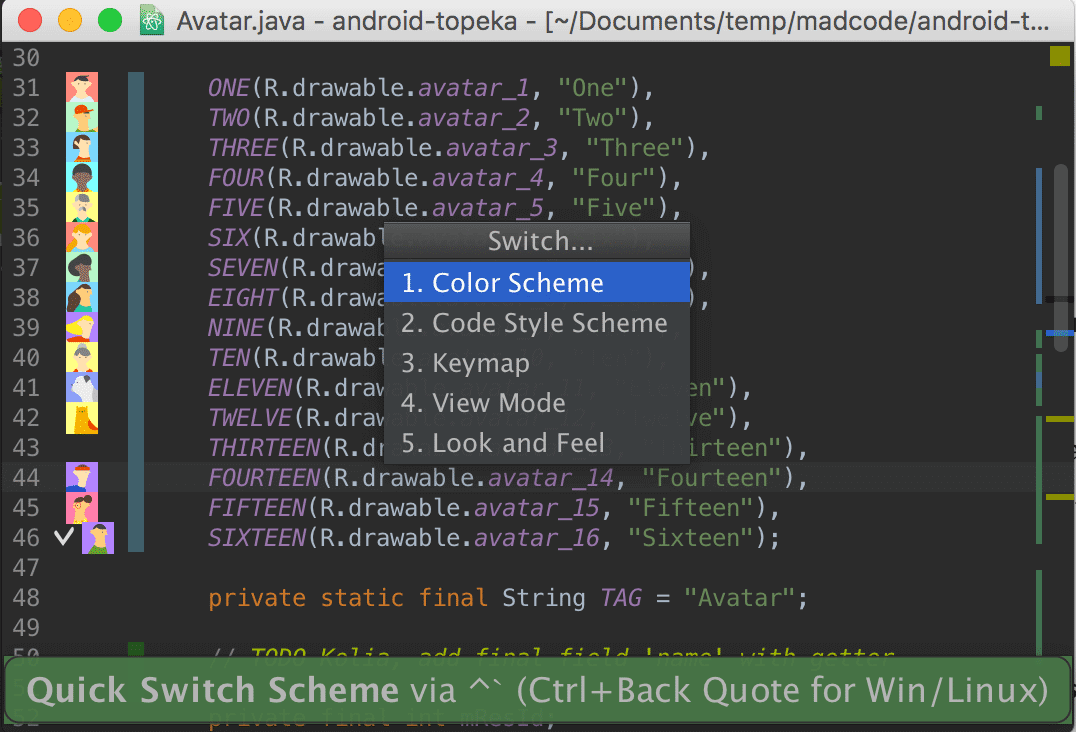
One note here: when setting up a dev machine, it’s good to make sure that both of the keymaps have the same shortcut for the Quick Switch Scheme, so neither of you need to mess around with keys, not knowing how to get to your keymap. It’s the same in all the predefined keymap schemes (Ctrl+` on Mac OS.), but again, when in doubt use the Find Action dialog.
Non-distraction Mode
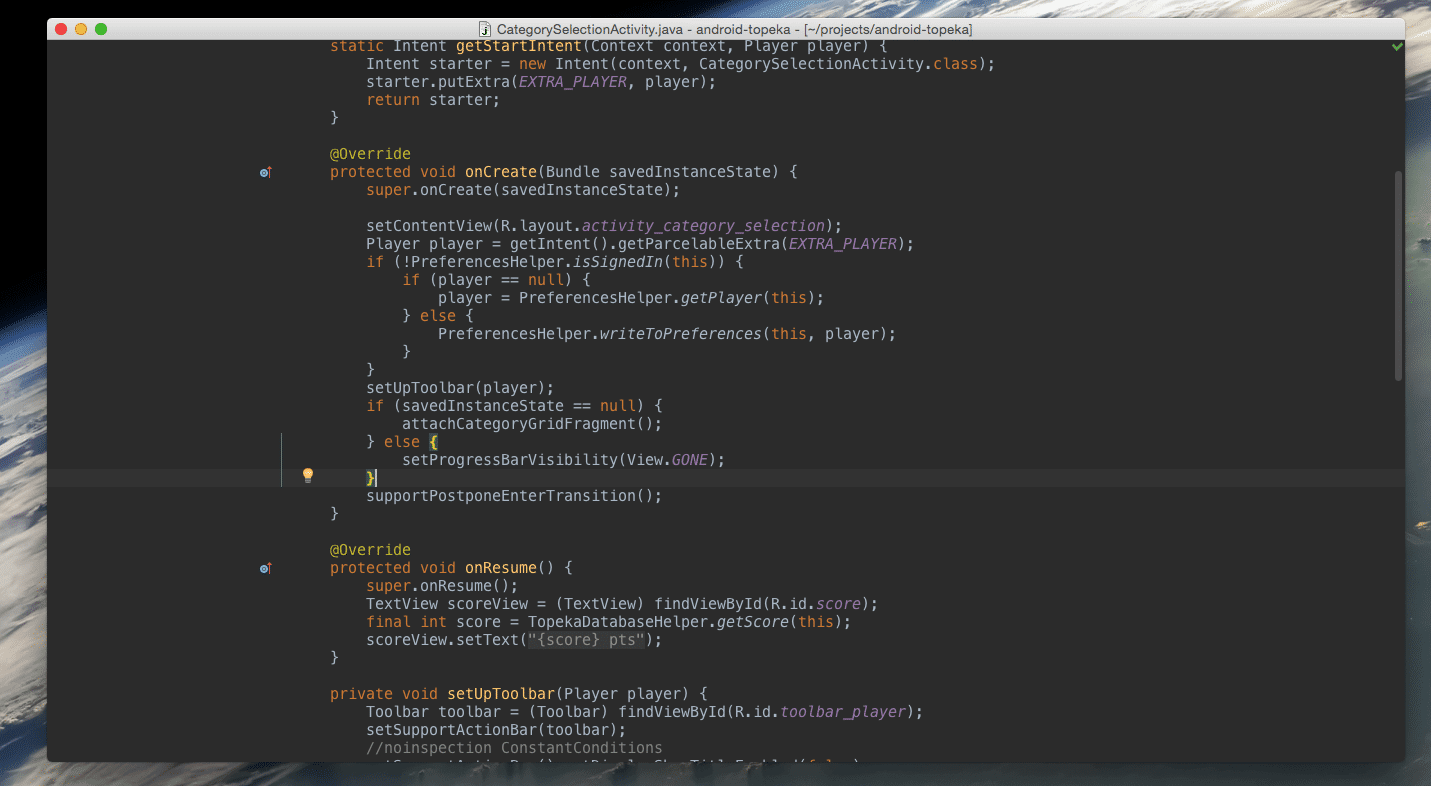
Ok, so you open Android Studio and what you usually see is something like this:

There are lots of useful windows, but do I need all of them right now when I just want to write some code and focus on the algorithm or architecture?
So the first thing you can do is apply the Hide All Tool Windows action Cmd+Shift+F12 on Mac OS.

Ok, that’s better. Nonetheless, icons and labels are present and space for the editor is reduced, which means you have to spend extra energy with your visual system to select what you want and filter out what you don’t. And what you usually want is code.
Meet Distraction Free Mode. You can enter/exit it from the View menu, or the Quick Switch Scheme dialog (see above), or with a shortcut. And of course, you can always use the Find Action.
In this mode you see only code and there is nothing really to distract you. You can also increase font size to make it more readable and thus more non-distracting.
When you need to access those hidden tool windows in Distraction Free Mode, you can easily do this with shortcuts, if you have some assigned to the windows, or with the super-intuitive key combination: Alt, Alt hold. This will show sidebars where tool windows are located in a hidden state and, while still holding Alt, with a mouse click, you can open them.
If you don’t want to use a mouse, however, you can use Find Action dialog. Within it, you can directly show or hide any tool window.
Multicursor
One of the coolest things in Android Studio, (and other IDEA-based IDEs) is the Multicursor feature. It enables you to create multiple carets inside the active editor. In having control over all of them at once you can not only input the same text in multiple places, but you can also do everything you could with one regular caret.
Live templates
It's much more simple to demonstrate this than to describe it.
Live templates are used in scenarios like the following:
- You type an abbreviation
- Press Enter
- ...Magic…
- Full code structure (`fori` -> full for loop structure)
There are a lot of live templates available for Android Studio - check Preferences-Editor-Live Templates tab to discover more.
Documentation on Live templates
Postfix operations
With postfix operations you can perform refactoring operations without highlighting and refactoring quick list. You just type . after structure and choose operation from methods autocompletion list. That really saves time!
Documentation on Postfix operations
Clipboard buffer
Android Studio remembers all your copy-pastes...
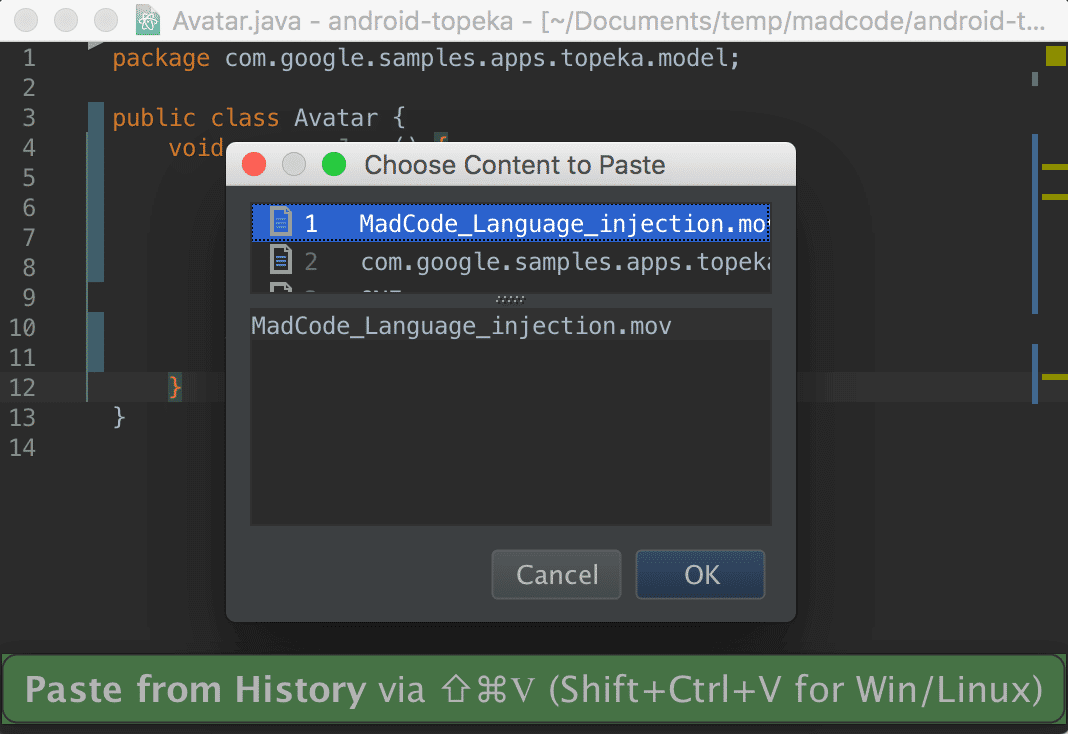
To view this dialog you should use Shift+Cmd+V instead of just Cmd+V. Also, you can set history size in Preferences (by default it is 5).
Documentation on Clipboard buffer
Scratch buffer
Every time you need to open an external text editor just to edit some text before pasting it into a code editor, you should use a scratch buffer. You can easily create a new buffer with the “Find command by name” dialog. Also, when you close the buffer you always can reopen it with the “Recently edited files” panel.
In addition to this feature AS also has a scratch files function. The main difference between scratch buffers and files is that with files you can choose the syntax of an edited text and editor will correctly highlight it.
Documentation on Scratch buffer
Testing
You can easily create or navigate to test with Go To: Test in the context menu (right click in the editor) or via a shortcut (Cmd+Shift+T is the default). If the file does not exist, Android Studio will show you a dialog to create it, where you can choose what framework to use (JUnit3, JUnit4, and there is even Spock option) and where to place it, as there are separate folders for unit tests (test) and Android Instrumentation tests (instrumentationTests).
To create new tests, you can use the Generate menu (Cmd+N), and select Test Method. This will insert a new test method from the template, including all the boilerplate code like @Test annotation, throws Exception in signature and even test prefix in the method name. This means you don’t have to write it yourself and risk forgetting something. You can always modify or add new templates in preferences.
Something else to bear in mind, if you are practicing TDD, and generally choose to constantly switch between test code and implementation (though you can do it with cursor history Cmd+[ , Cmd+] ), you can split your current editor horizontally or vertically and open implementation in one and tests in another split view.
When running tests, you don’t always have to start all tests with default configuration for the whole file. You can run each test separately using the intention menu (Alt+Enter) on the test method declaration or from the Run menu (Ctrl+Alt+R).
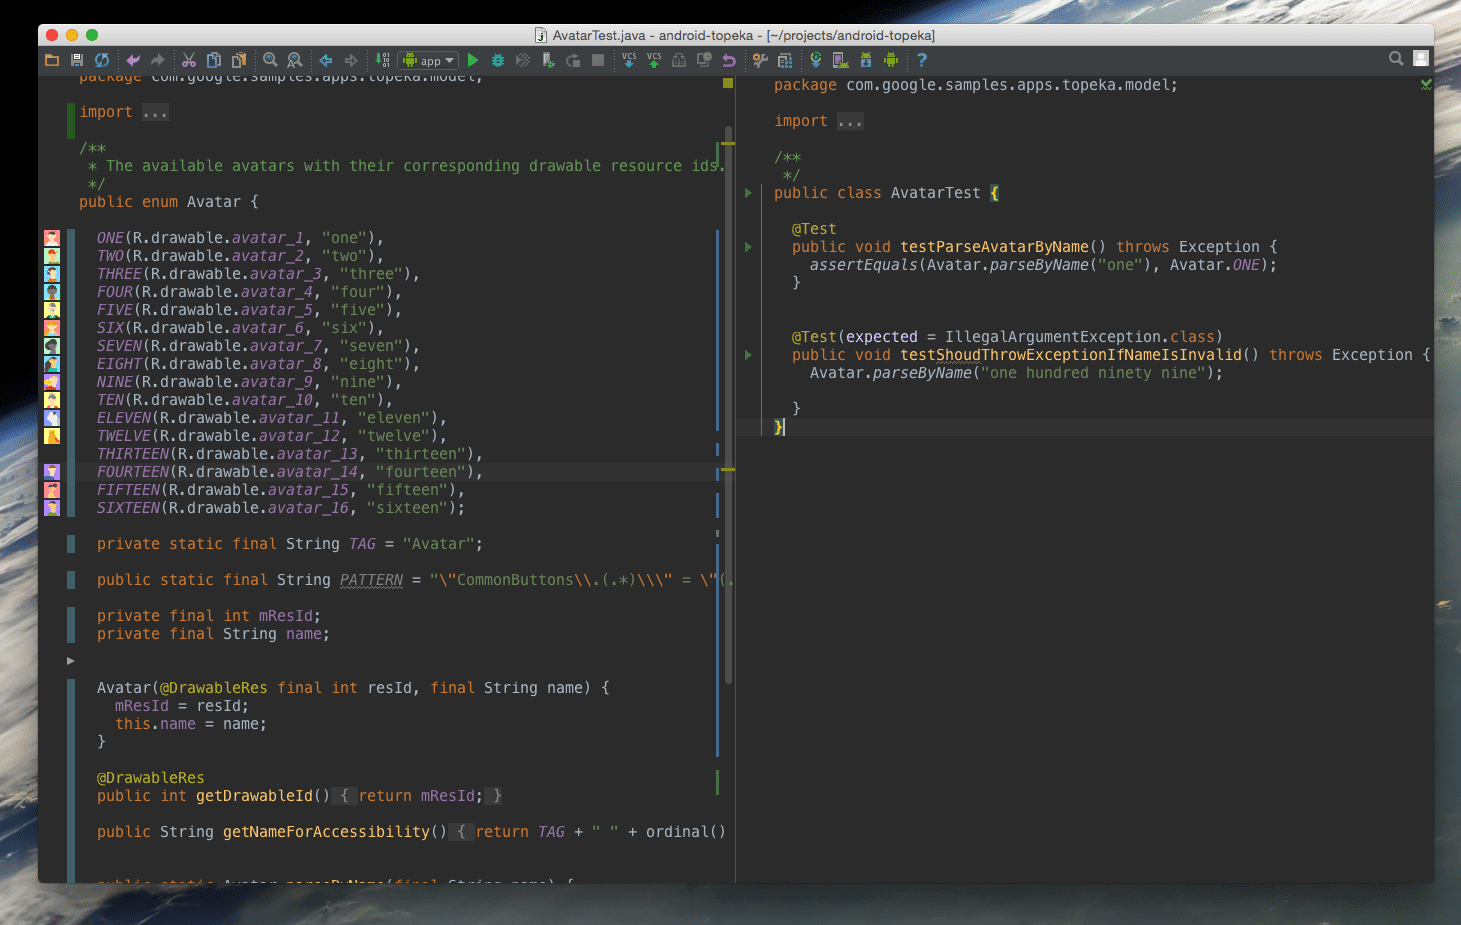
Language Injection
There is a cool feature called Language Injection. It is not only reduced to regular expression; you can also inject languages like JSON and SQL (in IDEA Ultimate Edition). With this feature you can inject language in a string, edit a fragment in a separate editor while IDE will put all escaping and transformations needed in the original string. With having caret over the string literal, you can use Intentions: Inject Language or reference and select the language you need.
Besides the injection feature, Studio can also assist you with regexp check: just call intention dialog in a string with a regular expression and choose “Check RegExp”.
Documentation on Language injection
Groovy Console
Groovy Console is a useful tool when you need to run some code snippets to check whether something works as expected, without building a whole project or writing tests (which may be unrelated to your code). You can open it with Find Action: Groovy Console.
Documentation on Groovy console
Logcat
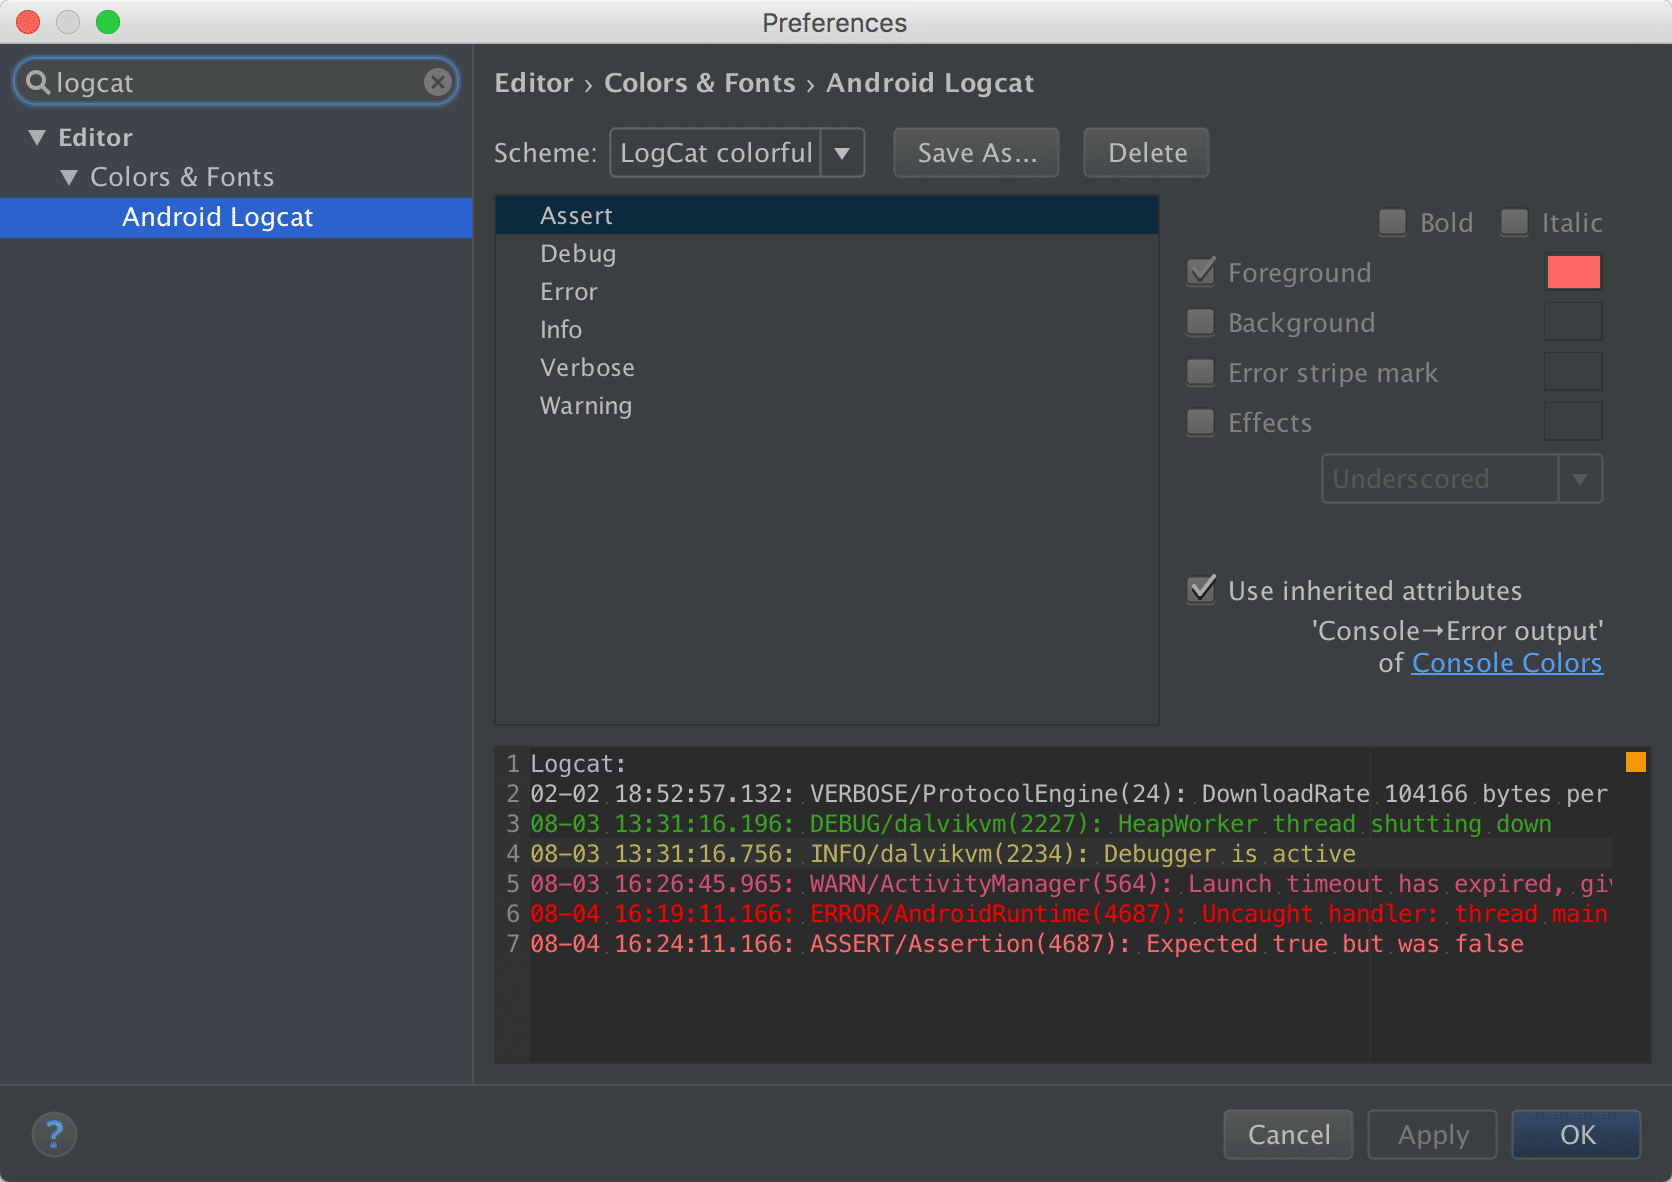
The last simple trick is about logcat output customization. With the default settings, you can see logcat messages that have Error or Assert level in red and all others in white (or black for the default theme). Like all other things in AS, you can change it and assign different colors for each of the output levels.
Android Studio JRE version
Android Studio is able to use different Java versions. This is important for Mac OS X users because:
- With Java 6, fonts are rendered with antialiasing, but not in Java 7+
- Secured updates cannot work with Java 6
But you can specify the JRE version used with an environment variable STUDIO_JDK. Example:
$ export STUDIO_JDK=/Library/Java/JavaVirtualMachines/jdk1.8.0_25.jdk
$ open /Applications/Android\ Studio.app
So, if you are OK with new fonts - use new Java, it’s a bit safer.
You can find more details here
Summary
Android Studio is a really powerful IDE that contains dozens of extremely useful tools, but they can only help you if you know about them :) We’ve collected a small list of videos that will inspire you with new discoveries:
- Android Studio for Experts (Android Dev Summit 2015)
- IntelliJ IDEA Tips and Tricks Full Version
- IntelliJ IDEA: 42 Tips and Tricks
- (About) 10 Things You (Probably) Didn’t Know You Could do in Android Studio